
Using a pull CDN with Imager X to optimize image delivery
Utilising a pull CDN together with Imager X is a simple and cheap way to optimize your site for a global audience.
— Published on January 31, 2021
One of the nice features of using a service like Imgix, or an external storage like AWS with CloudFront, is that it gives you CDN capabilities – meaning your images will be cached and served from a location close to your visitors. When serving a global audience, this makes a huge difference for visitors that's on the other side of the globe from where your webserver is located.
But, services like Imgix can be expensive. And utilising an external storage like AWS means you have to wait for the files to be uploaded whenever an image transform is generated, wasting precious seconds. If you choose to opt out of both, using a so called "pull CDN" (or, "origin pull CDN", "pull zone CDN", etc) could be a good alternative to consider.
With a pull CDN, you'll continue doing your image transforms locally, and the images will be available through your webserver. But instead of pointing your visitors directly to your images on your server, you'll point them at the pull CDN, and it will take care of the delivery.
When the pull CDN gets a request for an image meant for your site, it will first check if it already has the image in its cache. This happens at a location (called a PoP) close to your visitor. If I'm browsing from Norway, it'll probably be a server in Scandinavia somewhere, and if you're browsing from Singapore, it'll probably be a server somewhere in south-east Asia. If the image isn't there, it'll request the image from higher up the chain of cache servers, and if this was the first time the image was requested, it'll pull the image directly from your server. Hence, pull CDN. On later requests, the image will be saved in the PoP, and can be delivered much faster.
Setting up the CDN
There's a ton of different CDN services to choose from, and when it comes to pull CDN functionality, they pretty much deliver almost the same services. There're small variations in price, and some have more extensive networks than others. But, whichever you choose, it'll probably be a good option.
As an example I'll use Bunny CDN (that's a referral link, just so you know!), which I've used before, and have found to be well priced, performant, and, importantly, easy to use. I hate spending more time than necessary inside control panels with oblique language. Bunny CDN is as easy as it gets.
So, let's hop (pun intended 🐇) over to bunny.net and sign up for an account. After logging in, you'll be met by something that already guides you in the right direction.
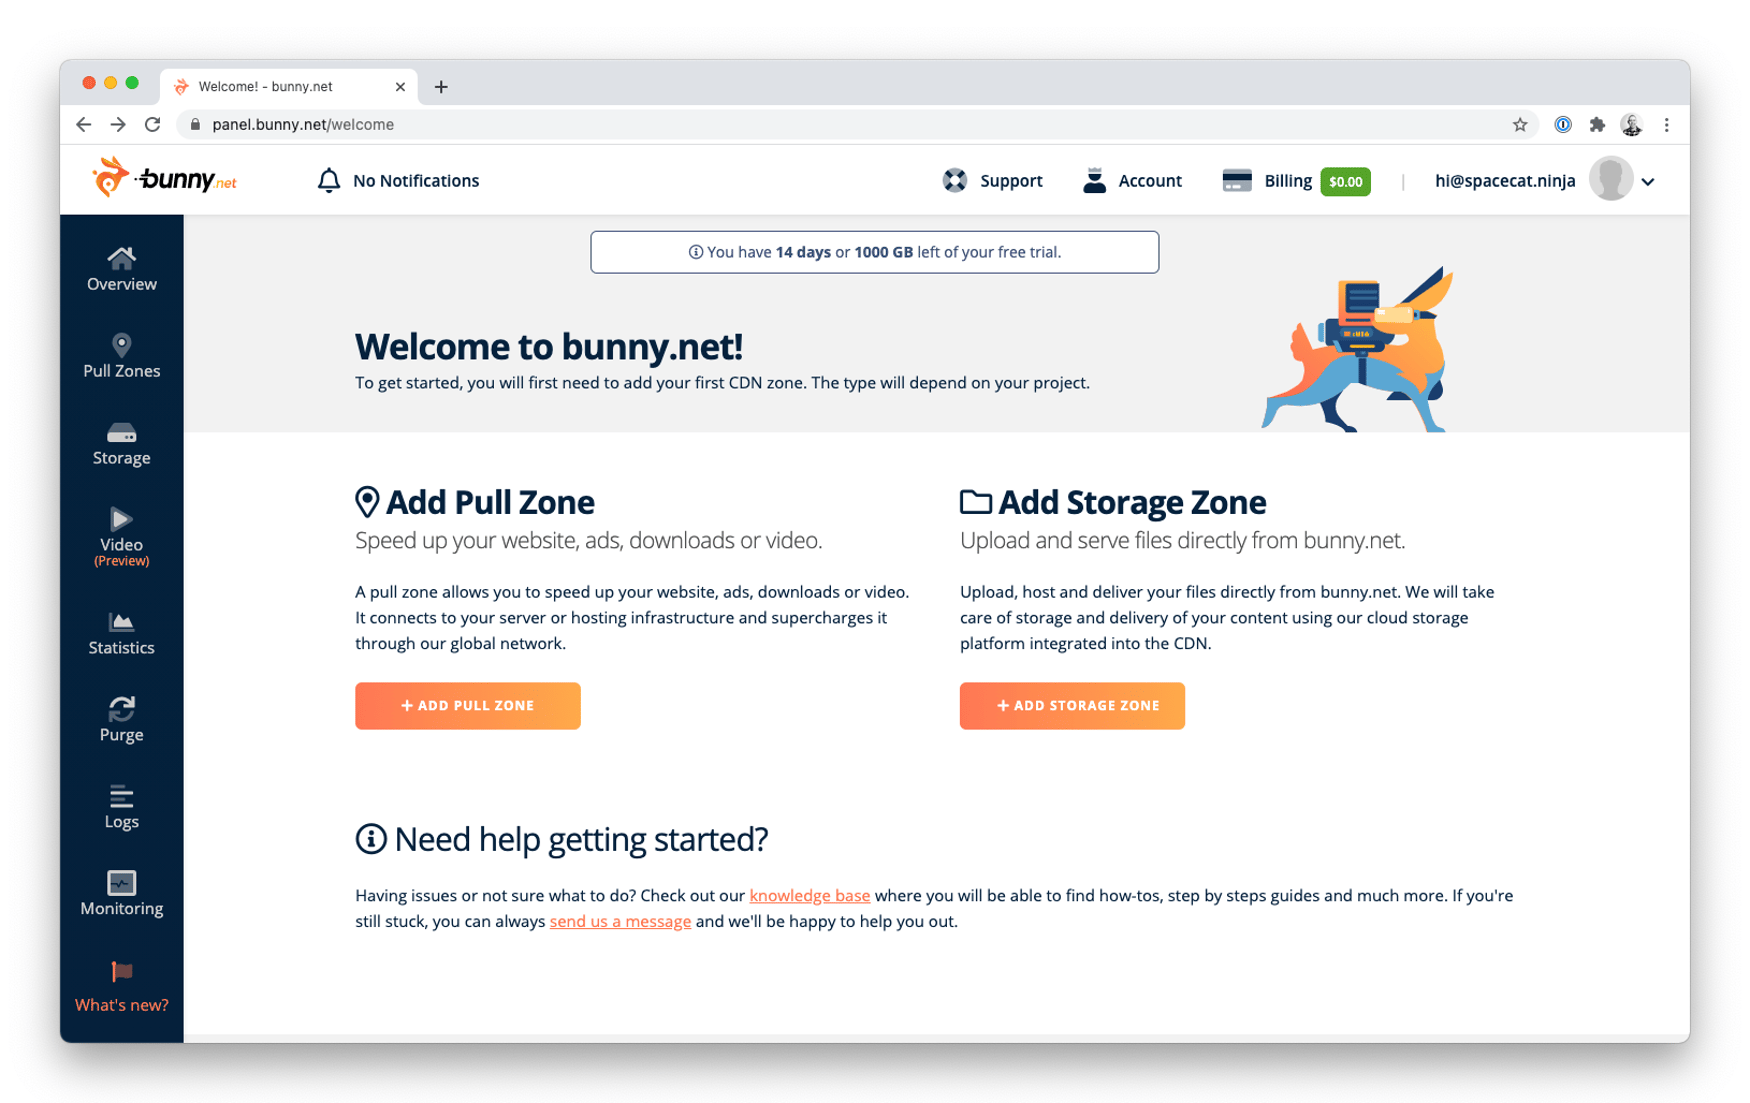
Add pull zone it says. Sounds about right!
Go ahead and click the button that says "Add pull zone". You'll be met by a new screen with a few simple input fields, notably "Name" and "Origin URL". "Name" will be part of the URL that we'll use to refer to the CDN zone, and "Origin URL" is the URL where you're images live.
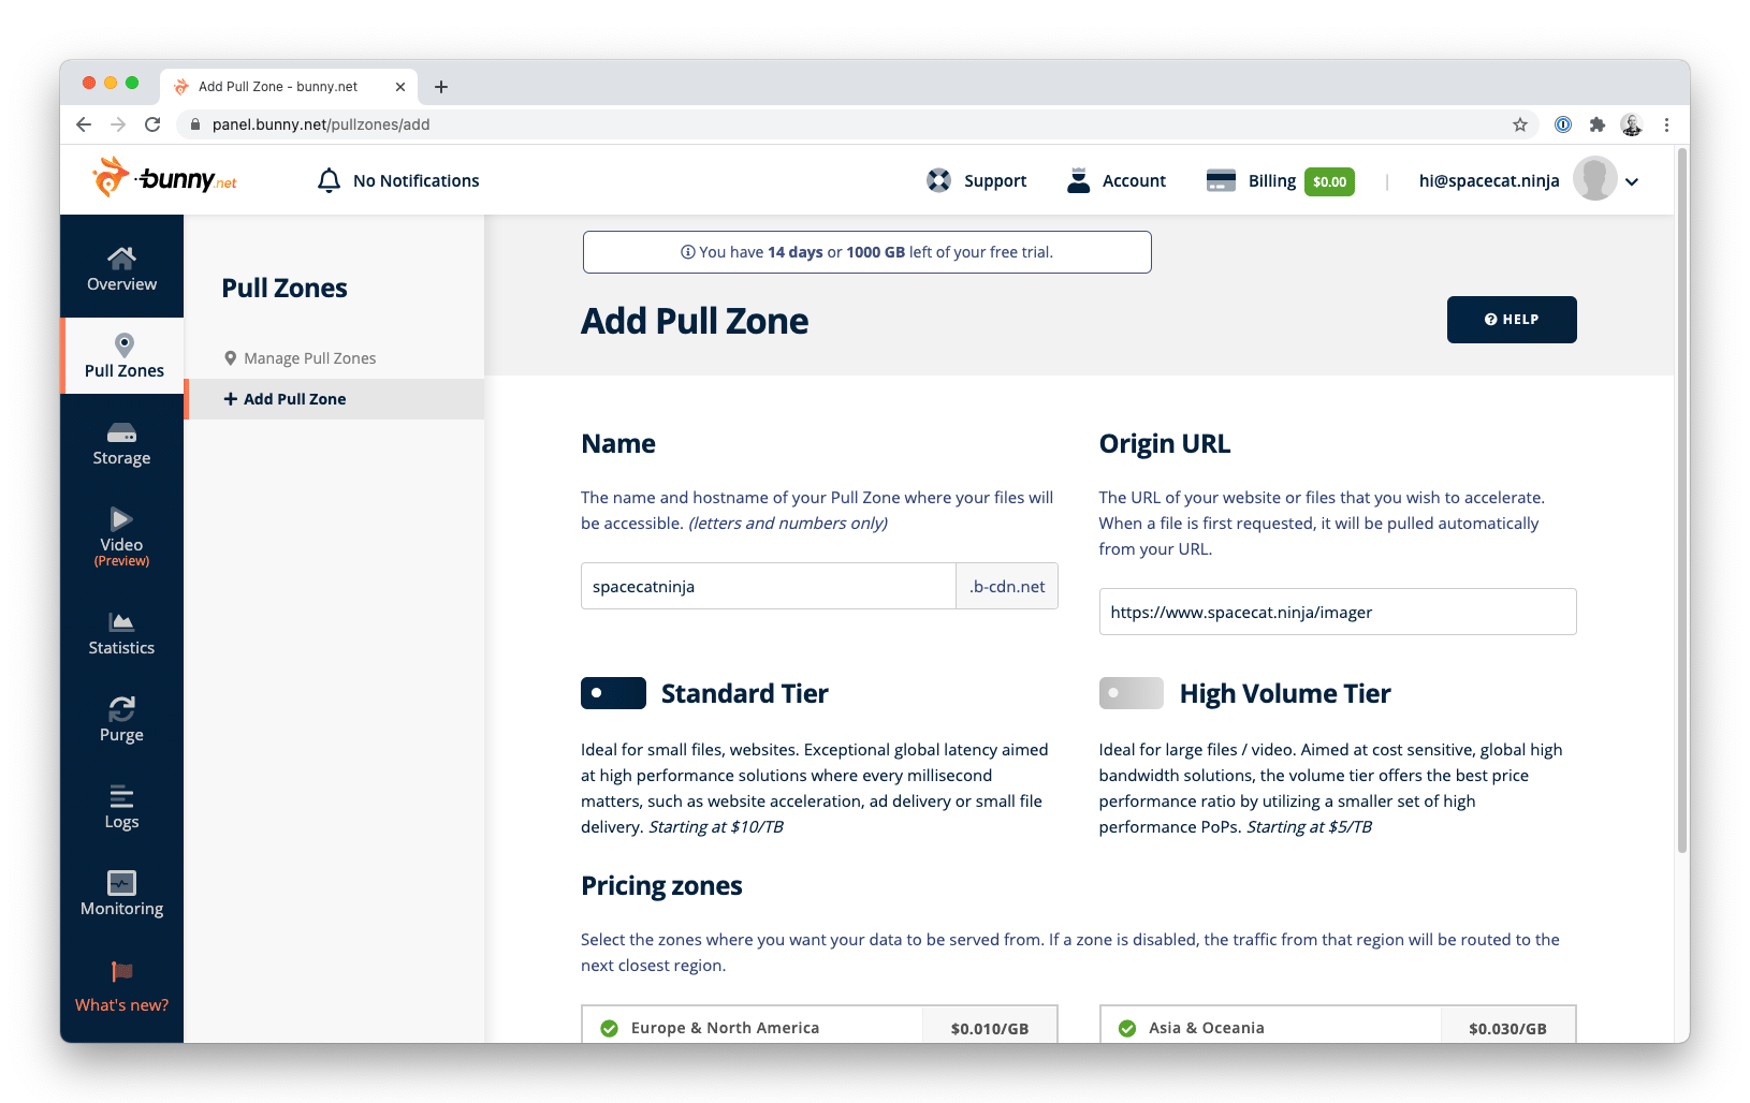
I'll splurge and go with the Standard Tier. 🍻
Go ahead and click the "Add pull zone" button, and we're done.
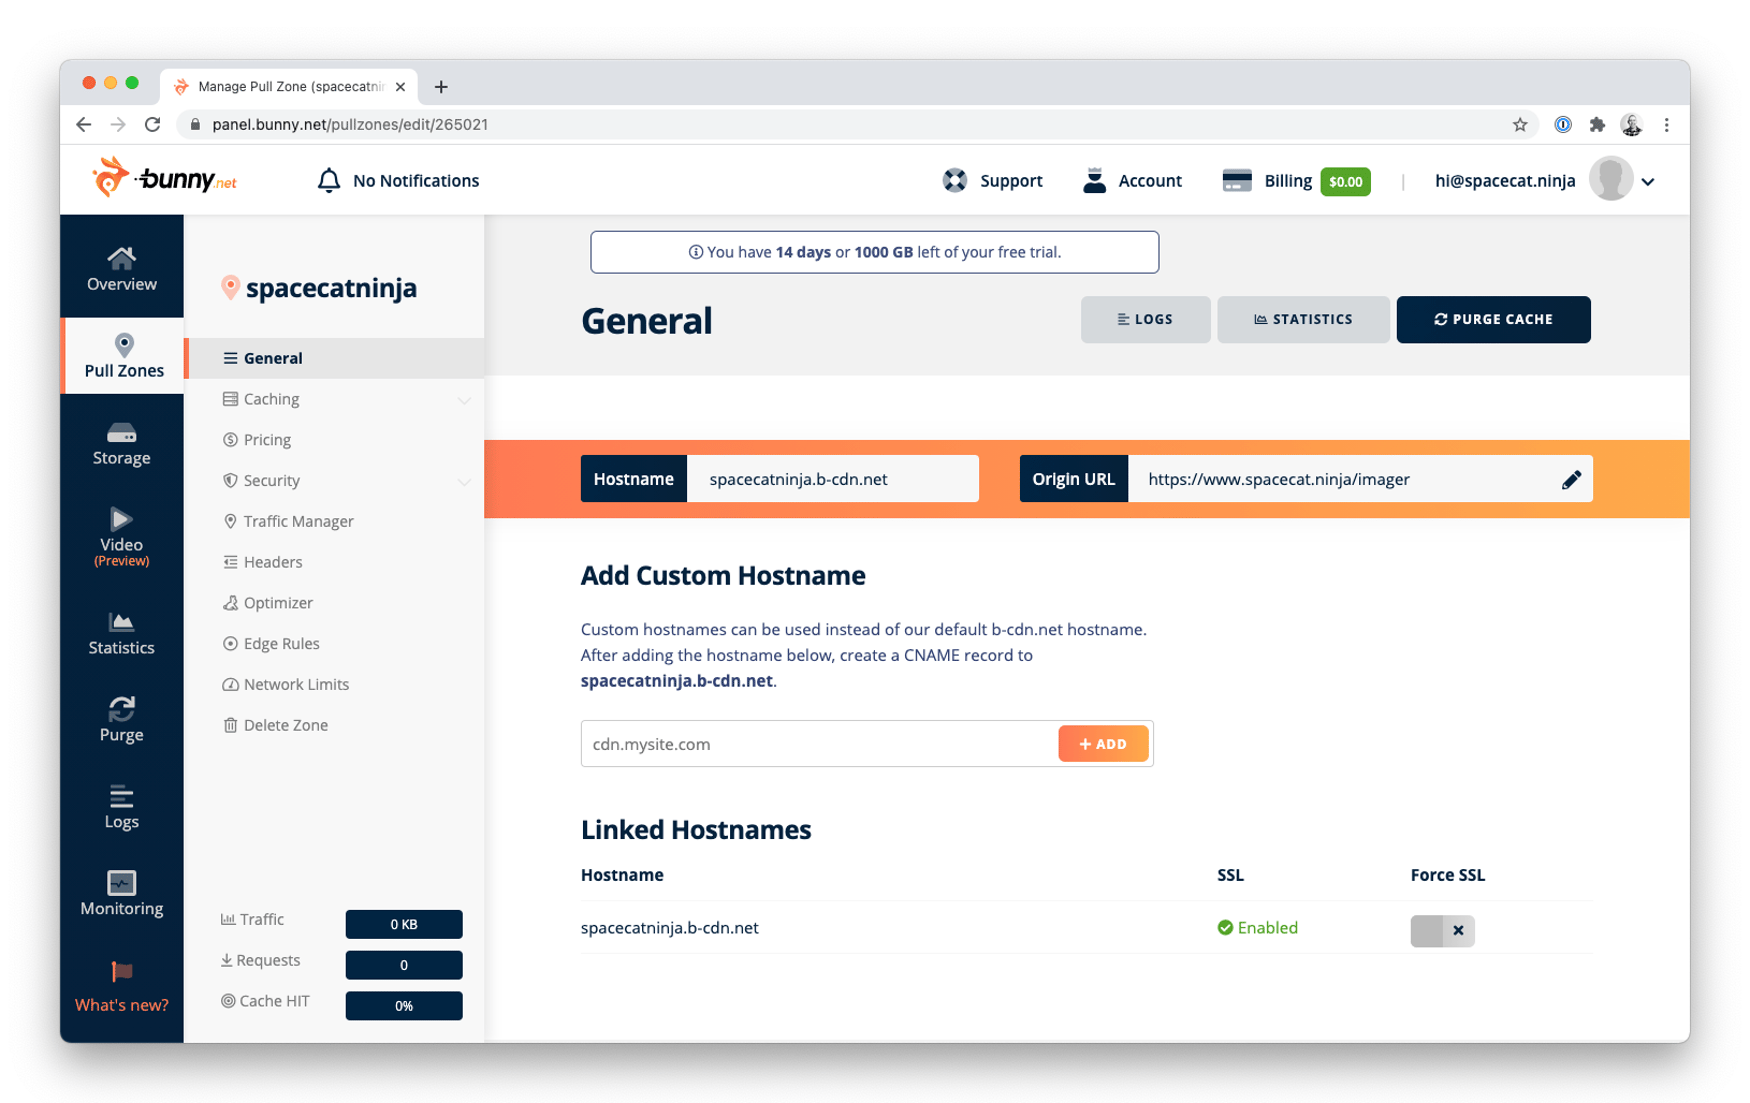
A lot to tinker with here, but the only things you need to care about is "Hostname".
Different services will have different names and settings for these things, but in the end, all you need is that URL for the zone you just created. In my case, spacecatninja.b-cdn.net.
Configuring Imager X
Assuming you've configured something in Imager X, you probably already have an imager-x.php config file in your config folder. If not, take a few seconds to create one and check out the documentation.
There're two settings that we need to care about, namely imagerSystemPath and imagerUrl. If you haven't configured them already, the default values will be:
'imagerSystemPath' => '@webroot/imager/',
'imagerUrl' => '/imager/',
This tells Imager to store the transformed images inside the web root of our site, and to use a relative URL, /imager/, to access them. The only setting we need to change is imagerUrl, and set it to the URL for our zone over at Bunny CDN.
'imagerUrl' => 'https://spacecatninja.b-cdn.net/',If you have changed the imagerSystemPath, make sure to change the "Origin URL" for your zone to point to the correct location.
Aaand that's it! 🎉 We're now delivering our transformed images through a global CDN.